
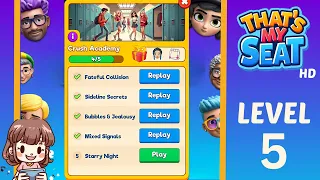
Crush Academy Level 3 Pattern Overview
The Overall Puzzle Structure
At the start of Crush Academy Level 3, you'll see a vibrant poolside party scene with several characters interacting. The core of the level involves managing these character interactions and fulfilling their requests, primarily by seating them correctly and ensuring they receive the right items. The visual layout is a circular pool area surrounded by seating, with a DJ booth and food stations visible. The main mechanics revolve around dragging characters to available seats, combining items like drinks and food, and making choices that affect character moods and relationships. This level fundamentally tests your ability to multitask, quickly identify character needs, and efficiently manage the flow of guests and items in a social setting.
The Key Elements at a Glance
- Characters: Various partygoers with individual needs and interactions. Their moods, indicated by emojis, are crucial for successful progression.
- Seating: The pool area has limited seating spots that need to be filled strategically to accommodate characters and facilitate interactions.
- Items: Drinks, ice cream, and sandwiches are key items that characters will request or that can be combined to fulfill their needs.
- DJ Booth: Seth, the DJ, is a central figure. His interactions and needs are tied to the overall party atmosphere.
- Interaction Bubbles: Speech bubbles above characters indicate their current thoughts, requests, or moods, guiding your actions.
Step-by-Step Solution for Crush Academy Level 3
Opening: The Best First Move
The most effective opening move in this level is to immediately address Nala's request. She's seen sipping a drink by the pool, and the objective is to get her into the jacuzzi. To do this, you need to get her a drink first. Dragging a tropical drink to Nala is the immediate priority. This action not only satisfies her immediate need but also sets her up to enter the jacuzzi, which is a key step in clearing space and progressing the scene. Following this, grab two ice creams and give one to Kuty and one to Alma, then guide Alma to the jacuzzi. This sequence clears up the initial character placements and opens up opportunities for further interactions.
Mid-Game: How the Puzzle Opens Up
Once Nala and Alma are in the jacuzzi, the scene opens up considerably. You'll then focus on Pinker, who is dancing near the DJ. The goal is to have her offered coffee by Attley. This happens naturally as the narrative progresses, so your task is to ensure Pinker remains engaged. Next, you'll see Jaina by the food station, lost in her meal. The key here is to let her be, as she's content. Valera will then appear on a sunbed looking for Attley. You'll need to guide Attley to Valera's sunbed. After this, Kahlo will lose interest in the party and retreat to her drawings, which you don't need to intervene with directly.
End-Game: Final Cleanup and Completion
The final stage involves several characters seeking sunbeds. Arden will politely ask for the painter to draw him. You'll need to find the painter character and direct them to Arden. Following this, Malcom will be relaxing on a sunbed. Ensure he's content and doesn't require further action. The last interaction to manage is Eeden arriving late and heading towards the stage. You need to ensure she finds a spot near the stage. Once all characters are appropriately placed and their immediate needs met, the level will conclude successfully, often with celebratory animations.
Why Crush Academy Level 3 Feels So Tricky
Misinterpreting Character Needs
Players often misread the character interactions because the speech bubbles can sometimes be subtle or appear rapidly. For instance, you might see Nala near the jacuzzi and assume she wants to go in immediately, but she needs a drink first. The visual cue of the drink cup and the text bubble are key. Always look for the specific item requested or the action indicated by the emoji above their head before moving them.
The Sunbed Shuffle
The sunbeds can be a point of confusion. Characters like Valera and Arden will be looking for specific spots or interactions. Valera is looking for Attley, so your focus should be on moving Attley to her. Arden, on the other hand, wants the "painter" to draw him, which means identifying and directing the painter character to Arden's location. Ignoring the specific role of the "painter" character can lead to wasted moves, as Arden won't be satisfied by simply being placed on a sunbed.
DJ Booth Dynamics
Seth the DJ is a central figure, but his role can be misleading. While he's on the stage, he's not directly asking for items or interactions in the same way as the other guests. His presence is more about setting the party atmosphere. Players might try to interact with him or seat him, which is unnecessary. The important thing is to ensure the other characters are happy and engaged with the party, which indirectly influences the overall success of the level. Focus on the characters with clear requests or interaction bubbles.
The Logic Behind This Crush Academy Level 3 Solution
From the Biggest Clue to the Smallest Detail
The core logic of this level, and many in "That's My Seat," is about fulfilling character needs in the correct order. The biggest clue is often the most immediate visual cue: a character looking for something or someone, or an item being readily available near them. For Nala, the "drink" cue is the biggest clue. Once that's handled, you then look for the next biggest need, like placing Alma in the jacuzzi after she gets her ice cream. You're essentially working through a series of small, interconnected objectives, prioritizing those that unlock further opportunities. It's a chain reaction: solve one need, and it opens up the next solution.
The Reusable Rule for Similar Levels
The reusable rule for levels like Crush Academy 3 is to always prioritize actions that clear space or unlock new interactions. If a character is blocking a key area or needs an item that allows them to move to a new location, address that first. Look for characters who are asking for specific items. Fulfilling these requests often leads to them moving out of the way or creating an opening for another character. Always scan the entire scene for immediate needs and then tackle them in an order that creates the most efficient flow. Don't get bogged down by static characters; focus on those with active requests or who are preventing progress.
FAQ
What should I do if a character isn't moving?
If a character isn't moving, check if they have an unmet need or if they are waiting for another character to interact with them. Look for speech bubbles or items they might be requesting. Sometimes, they are simply in a resting state and will move on their own when other interactions are completed.
How do I know which character needs what item?
Pay close attention to the speech bubbles above the characters' heads. They often contain emojis or visual cues that indicate what they want, such as a drink, food, or to sit in a specific spot. If a character is looking at another character or an item, that's usually a good indicator of their need.
What if I make a mistake and a character gets unhappy?
If a character becomes unhappy, try to address their need as quickly as possible. Sometimes, a wrong move can slightly lower their mood, but they can usually be cheered up by fulfilling their requests. If a character is critical to progression, prioritize their needs. If they are less critical, you might be able to focus on other tasks and return to them later.