
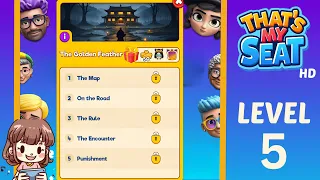
The Golden Feather Level 1 Pattern Overview
The Overall Puzzle Structure
At the start of "The Golden Feather" level 1, players are presented with a visually striking map laid out on an island. The island is surrounded by water, with various landmasses connected by bridges or clear paths. The core of the puzzle involves navigating this map by selecting locations, with the goal being to find the titular Golden Feather. The primary mechanic revolves around reading clues that describe the locations and characters associated with them. The level's design immediately focuses on spatial reasoning and clue interpretation, tasking players with piecing together a narrative to guide their path.
The Key Elements at a Glance
- The Map: This is the central visual element, showcasing the island with its distinct areas and potential destinations. It's the player's primary guide.
- Character Icons: Various characters, each with a unique icon, are presented. These characters are tied to specific locations on the map and are crucial for deciphering the clues. Key characters seen include Icoda, Sahara, Jaluth, Yujin, Cthul, Torhos, Anugh, Ymbog, Arktin, Tamara, and Dom.
- Clues/Dialogue: Text boxes provide narrative snippets and clues. These are the critical pieces of information that players must use to determine the correct sequence of locations. The clues often describe characters and their relation to specific map points.
- Checkboxes: Accompanying each clue are checkboxes. Players must correctly identify which character or location corresponds to the clue and mark the appropriate checkbox.
Step-by-Step Solution for The Golden Feather Level 1
Opening: The Best First Move
The most effective starting move in this level is to identify the first clue and its associated character. The initial clue, "My master said, 'Take this map. It will help you find the Golden Feather. When you set out on your journey, you must first complete the path within yourself. For that reason, you will be tested.'" is followed by a checkbox next to Icoda. Selecting Icoda first is crucial because the game then reveals the clue, "Icoda was the lord of the southern sea. It dwelled in the waters between the island and the desert realm." This clue directly connects Icoda to a specific geographical area on the map (the sea bordering the island) and allows the player to place Icoda correctly, opening up the next step of the puzzle.
Mid-Game: How the Puzzle Opens Up
After correctly placing Icoda, the next clue reads, "Tamara was somewhere at the center of the map. Not on the island, but it stood by the shore. On the other side of the water—that is, on the shore of the island—there was Aneros." This clue requires players to understand the spatial relationships described. The "center of the map" and "by the shore" points to a location. Crucially, it also tells us Aneros is on the island shore. Selecting Tamara and then Aneros on the island shore is the logical next step. This move clarifies the relative positions of two more characters and continues to build the path.
Following this, the clue "Jaluth was a dragon shown on the map as dwelling in the desert realm. It was in the south." directs players to place Jaluth in the southern desert area. The map shows Jaluth within this region. Successfully placing Jaluth reveals the subsequent clue: "Anugh was the mountain at the very north of the map. It was so tall that it almost pierced the clouds." This clue points to the northernmost mountain on the map, and players should select Anugh there. These steps progressively reveal character locations, solidifying the path towards the Golden Feather.
End-Game: Final Cleanup and Completion
As the game progresses, players will encounter clues like "Yujin is a monk who set out on a journey...". The player is directed to place Yujin in the center of the map, which aligns with the narrative of a journey starting from a central point. This move leads to the next clue: "Cthul never stayed near the shores. It was a legendary creature that lived hundreds of kilometers deep, at the very center of the northern sea." The game shows Cthul positioned in the central northern sea area, correctly placed according to the clue.
The subsequent clues continue this pattern, requiring players to match characters like Ymbog, Arkkin, Torhos, and Dom to their described locations. For example, "Dom was somewhere between me and the Golden Feather. It was close to the center of the island." This places Dom near the center. The final few clues will confirm the entire path, with characters like Ymbog potentially being the final piece to place, leading to the successful retrieval of the Golden Feather. The "Well Done!" screen confirms the successful completion of the level.
Why The Golden Feather Level 1 Feels So Tricky
Misinterpreting "Center of the Map"
A common pitfall for players in this level is misinterpreting what "the center of the map" actually refers to. Initially, it might seem obvious to pick the very middle point of the entire island. However, the game's clue for Yujin specifically states he is "on a journey" and standing "at the center of the island." This subtle wording suggests the island's center, not the map's geometric center. The visual cue of Yujin's avatar being placed in the heart of the island, away from the water's edge, is the key detail. Players who initially place him at the absolute center of the entire screen might find their subsequent clues don't quite match up, forcing them to reconsider the definition of "center."
The Ambiguity of "Near the Shore"
Another tricky aspect is the phrasing "near the shores" or "by the shore." Some characters might appear to be on the edge of the island, but the clues often require a more precise placement. For instance, the clue for Tamara mentions standing "by the shore," and Aneros is on the "shore of the island." This implies that characters described as being "by the shore" are specifically on the sandy parts of the island that meet the water, not necessarily in the water itself or too far inland. The visual representation of the map clearly demarcates these areas. Paying close attention to whether a character is described as being on the shore, near the shore, or in the water is crucial for correct placement.
Confusing Character Descriptions with Locations
Players might get confused by descriptive elements of the characters themselves and mistake them for location hints. For example, Jaluth is described as a "dragon shown on the map as dwelling in the desert realm." While "desert realm" is a location clue, some players might focus too much on the "dragon" aspect and overlook the specific geographical reference. The solution lies in connecting the character's name to the correct region described. The map visually highlights these distinct regions, such as the desert, mountains, and central island area. Matching the character's portrait to the described environment is the straightforward approach here.
The Logic Behind This The Golden Feather Level 1 Solution
From the Biggest Clue to the Smallest Detail
The fundamental logic of this level, and indeed many puzzle games, is to start with the most concrete and unambiguous clues and use them to anchor the rest of the puzzle. The first clue, as mentioned, is a great starting point because it directly links Icoda to a specific, easily identifiable location. Once that anchor is set, players can use the relative positioning described in subsequent clues ("near," "between," "on the other side of") to deduce the placement of other characters. It's a process of deductive reasoning, where each correctly placed character provides context for the next clue, gradually revealing the full map and the path to the Golden Feather. The narrative itself acts as a guide, with each piece of dialogue building upon the last.
The Reusable Rule for Similar Levels
The core solving pattern here is to prioritize clues that explicitly name a character and a distinct location or feature on the map. These serve as your initial "nodes." Once you have a few nodes placed correctly, you can then work on clues that describe relative positions or relationships between characters ("X is next to Y," "Z is between A and B"). Always look for the most direct link first – a character's name paired with a clear geographical marker on the map. If a clue is ambiguous, like "center of the map," try to cross-reference it with other clues that might clarify the intended area. This methodical approach of building from certainty to uncertainty is a highly effective strategy for similar narrative-driven or map-based puzzle levels.
FAQ
How do I find the Golden Feather in Level 1?
To find the Golden Feather, you need to correctly place each character on the map based on the textual clues provided. Start by matching characters with explicit location descriptions, then use relative clues to place the remaining characters, and finally, the Golden Feather will be revealed.
What if I place a character in the wrong spot?
If you place a character incorrectly, the subsequent clues might not align, or the game may not progress as expected. The best approach is to re-read the clues carefully, paying attention to the precise descriptions of locations and character relationships, and then adjust their positions on the map.
How do I interpret the clues in "The Golden Feather" level?
The clues often describe characters and their association with specific landmarks on the map. Focus on keywords that refer to locations (e.g., "south," "north," "shore," "desert," "mountain," "center") and match them to the visual elements on the island map. The narrative provides the context for these placements.